Unlock the Microscopic Universe: Your Ultimate Guide to Mastering Macro Photography

Unlock the Microscopic Universe: Your Ultimate Guide to Mastering Macro Photography . Image by Pasindu’s Imperfect Shutter

Unlock the Microscopic Universe: Your Ultimate Guide to Mastering Macro Photography . Image by Pasindu’s Imperfect Shutter


Macro photography unveils a hidden dimension where dewdrops become crystal orbs, insect eyes transform into kaleidoscopic landscapes, and flower petals reveal cosmic patterns. 

This captivating genre magnifies life’s tiniest wonders, blending art with scientific precision. 

Whether you’re a curious beginner or a seasoned shutterbug, this guide delivers actionable techniques, gear insights, and creative strategies to help you dominate search rankings and capture jaw-dropping macro images.  


What is Macro Photography? Beyond the Basics

True macro photography captures subjects at 1:1 magnification ratio or higher, meaning a 10mm ant appears life-sized on your camera sensor. 

But modern techniques push further:  

- Extreme macro (5:1+) reveals microscopic textures like pollen grains or butterfly scale structures.  

- Difference from close-ups: Standard close-ups (e.g., smartphone "macro mode") rarely exceed 1:3 ratio. 

True macro requires specialized gear for uncompromised detail.  

The reason why it fascinates is that it transforms mundane objects—a drop of water, a rusted bolt—into abstract art, fostering deeper appreciation for nature’s unseen designs.  


Gear Deep Dive: Building Your Macro Toolkit


1. Macro Lenses: The Gold Standard


Focal length choices

  - 60mm: Ideal for stationary subjects (coins, jewelry).  

  - 100mm: Perfect for insects (working distance: 6-12 inches).  

  - 150-200mm: Essential for skittish wildlife (butterflies, dragonflies).  


Pro tip

Canon’s 100mm f/2.8L or Laowa 100mm 2x Ultra-Macro offer 2:1 magnification for scientific-grade detail.  


2. Budget Alternatives: Democratizing Macro


Extension tubes

Hollow cylinders (e.g., Kenko DG set) that reduce minimum focus distance. 

Cost: Under $150. 

Drawback: Light loss at higher extensions.  


Reverse lens adapters

Flip a 50mm prime (e.g., Nikon 50mm f/1.8) for 3:1 magnification. 

Cost: About $20 adapter. 

Ideal for: DIY enthusiasts.  


Close-up filters

Screw-on diopters (e.g., Hoya +10). 

Best for: Smartphones or entry-level DSLRs.  


3. Stabilization Systems


- Tripods: Use geared heads (Manfrotto 410) for micro-adjustments.  

- Focus rails: Sliding rails (Neewer macro rail) enable 0.1mm precision for focus stacking.  

- Field hacks: Bean bags or clamps to stabilize foliage in windy conditions.  


Lighting Mastery: Sculpting Miniature Worlds


Natural Light Techniques

- Golden hour magic: Shoot 1 hour after sunrise for warm, directional light.  

- Cloudy days: Nature’s softbox—diffuses light evenly across textures.  

- Reflector tricks: Use white cardstock to bounce light into shadows beneath mushrooms or petals.  


Artificial Lighting Strategies

- Ring flashes: Even illumination for deep crevices (e.g., Godox ML-150II).  

- Twin flashes: Positionable arms for 3D modeling (e.g., Canon MT-26EX-RT).  

- DIY diffusers: Modify flash with tracing paper or milk jug plastic to soften harsh highlights.  


Creative Lighting

- Backlighting: Backlight translucent subjects (leaves, insect wings) for ethereal glow.  

- Light painting: Use a mini-LED torch to selectively illuminate night macro subjects (spiders, dewdrops).  


Conquering Focus & Depth of Field


The Macro Paradox

At 1:1 magnification, depth of field shrinks to razor-thin 0.5mm. 

Solutions:  

1 - Aperture balance: Shoot at f/8-f/11 for sharpness vs. diffraction trade-off. 

Avoid f/22+ unless focus stacking.  

2 - Focus stacking workflow:

  Mount camera on rail.  

  Capture 10-50 shots, shifting focus 0.2mm between frames.  

  Blend in Helicon Focus or Photoshop.  

3 - Peaking technique: For moving subjects (bees), pre-focus on a flower and shoot in bursts.  


Field-Proven Shooting Techniques


1. Subject Isolation

   - Place dark backgrounds 12+ inches behind flowers to create creamy bokeh.  

   - Spray water on spiderwebs for diamond-like highlights.  


2. Composition Rules for Tiny Frames

   - Fibonacci spirals: Alight insect eyes with the spiral’s center.  

   - Negative space: Position subjects off-center for dynamic tension.  


3. Working With Live Subjects

Insect photography ethics: Never freeze or glue insects. 

Instead:  

     - Shoot early morning when insects are cold and slow.  

     - Use long lenses to avoid disturbing habitats.  


Post-Processing Macro Images


- Focus stacking: Auto-align layers in Photoshop → "Auto-Blend Layers".  

- Color correction: Use Adobe Lightroom’s HSL sliders to intensify iridescent insect colors.  

- Noise reduction: Apply Topaz DeNoise AI to high-ISO insect shots.  

- Dodge & burn: Enhance 3D pop by lightening highlights and deepening shadows.  


Finding Inspiration: Beyond Your Backyard


1 - Urban macro: Rust textures, peeling paint, or circuit boards.  

2 - Underwater macro: Use diopters with underwater housings for coral polyps.  

3 - Seasonal themes: Frost crystals in winter, pollen in spring.  

4 - Notable photographers:  

 = Levon Biss: Insect portraits shot at 10x magnification.  

  = Sue Bishop: Floral abstracts with painterly bokeh.  


Common Macro Mistakes & Fixes

Common macro mistakes & fixes mentioned in brief:

Common macro mistakes & fixes. Image by Pasindu’s Imperfect Shutter


Conclusion: Your Journey Into the Miniature Cosmos


Macro photography is meditation with a camera—an invitation to slow down and marvel at veins on a ladybug’s wing or fractal patterns in ice. 

By mastering magnification tools, precision lighting, and depth-defying focus techniques, you’ll transform invisible worlds into monumental art. 

Remember: Every backyard holds a universe waiting to be discovered. 

Start small, stay curious, and let the tiny things tell their grand stories.  


Happy shooting!

From Pasindu (Pasindu’s Imperfect Shutter) 🥰


#MacroPhotography #CloseUpPhotography #MacroLens #PhotographyTips #NaturePhotography #MacroWorld #CameraGear #FocusStacking #MacroOfTheDay #PhotographyGuide  #pasindusimperfectshutter
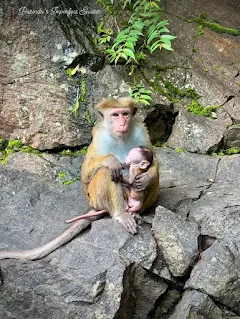


Ultimate Wildlife Photography Guide: Tips, Techniques & Gear for Stunning Shots


Ultimate Wildlife Photography Guide: Tips, Techniques & Gear for Stunning Shots. Image by Pasindu’s Imperfect Shutter
Ultimate Wildlife Photography Guide: Tips, Techniques & Gear for Stunning Shots. Image by Pasindu’s Imperfect Shutter


Wildlife photography is an exhilarating and challenging genre that immerses you in nature, letting you capture wild animals in their natural habitats. 

With my experience as a wildlife photographer, I’ll share some actionable techniques and practical tips to elevate your wildlife photography adventures.  


What is Wildlife Photography? The Art of Capturing Nature  

Wildlife photography focuses on documenting animals in their ecosystems. 

It demands patience, persistence, and deep knowledge of animal behavior. 

The goal? To create compelling images that tell stories, evoke emotions, and support wildlife conservation efforts.  


Essential Wildlife Photography Techniques  


1. Mastering Animal Behavior for Stunning Wildlife Shots

Understanding your subject’s habits is critical. 

Research species’ habitats, feeding patterns, and social dynamics. 

Observe quietly from a distance to predict movements and interactions.  


2. Choosing the Best Wildlife Photography Gear

Invest wisely:  

   - Camera: Opt for fast burst rates and excellent low-light performance (e.g., full-frame DSLRs or mirrorless cameras).  

   - Lenses: Telephoto lenses (200mm–600mm) are essential for distant subjects. Image stabilization reduces shake.  

   - Support: Use a sturdy tripod or monopod for stability.  

   - Protection: Weatherproof bags and insect repellent safeguard gear.  


3. Advanced Composition for Wildlife Photography

Elevate your shots by mastering the proper composition techniques:

   - Rule of Thirds: Position subjects off-center for dynamic framing.  

   - Leading Lines: Use natural elements (branches, rivers) to guide the eye.  

   - Negative Space: Highlight the animal’s environment for scale and drama.  


4. Harnessing Natural Light in Wildlife Photography

Golden hour (dawn/dusk) offers warm, soft light that enhances textures. 

Overcast days provide diffused lighting for even exposure.  


Practical Wildlife Photography Tips  


1. Prioritise Patience and Persistence

Wildlife photography often requires hours (or days) of waiting. 

Stay committed—the perfect shot is worth it.  


2. Stay Silent and Minimize Movement

Avoid startling animals. 

Use your camera’s silent mode and move slowly.  


3. Freeze Action with Fast Shutter Speeds

Use ≥1/1000s shutter speed to capture sharp images of moving wildlife.  


4. Focus Sharply on the Eyes

Eyes convey emotion. 

Enable continuous autofocus (AI Servo/AF-C) for tack-sharp results.  


5. Capture Behavior and Animal Interactions

Seek moments like feeding or play to add storytelling depth.  


6. Leverage Burst Mode

Shoot in rapid sequences to nail fleeting moments.  


7. Practice Ethical Wildlife Photography

Respect habitats: maintain distance, avoid disruption, and follow conservation guidelines.  


Inspiration for Your Wildlife Photography Journey  


1. Explore National Parks and Wildlife Reserves 

   Hotspots like Yellowstone or Serengeti offer unparalleled access to diverse species.  


2. Study Nature Documentaries

   Learn from BBC Earth and National Geographic to understand animal behavior.  


3. Enter Wildlife Photography Competitions

   Compete in contests like Wildlife Photographer of the Year for exposure and growth.  


4. Follow Top Wildlife Photographers

   Gain insights from pros like Frans Lanting and Ami Vitale.  


5. Join Photography Communities

   Share work in online forums or local clubs for feedback and motivation.  


Conclusion  

Wildlife photography merges technical skill with profound respect for nature. 

By applying these wildlife photography techniques—prioritizing ethics, mastering gear, and studying behavior—you’ll create impactful images that champion conservation. 

Grab your camera, venture into the wild, and start shooting!  


Happy shooting!

From Pasindu (Pasindu’s Imperfect Shutter) 🥰


#pasindusimperfectshutter #photographyeveryday #photography #beginnersguide #essentialsofphotography #wildlifephotography #learnphotography #beginnerfriendly #wildlife


Capturing the Beauty of Nature: A Guide to Landscape Photography


Capturing the Beauty of Nature: A Guide to Landscape Photography: Image by Pasindu’s Imperfect Shutter


There’s something profoundly satisfying about landscape photography. 


It allows us to capture the beauty and grandeur of the natural world, transforming fleeting moments into timeless images. 


Over the years, I’ve developed a deep appreciation for this genre, and I’m excited to share my insights, techniques, and practical tips to help you create stunning landscape photographs.


What is Landscape Photography?


Landscape photography is all about capturing the essence of the natural world. 


It involves photographing wide vistas, mountains, forests, bodies of water, and even urban landscapes. 


The goal is to convey the beauty, scale, and emotion of a scene, often with a strong emphasis on composition and lighting.


Techniques for Great Landscape Photography


1. Composition


Composition is crucial in landscape photography. 


It’s about arranging the elements within the frame to create a balanced and visually appealing image.


- **Rule of Thirds:** Divide your frame into nine equal parts using two horizontal and two vertical lines. Place key elements along these lines or at their intersections to create a balanced composition.


- **Leading Lines:** Use natural lines, such as rivers, roads, or tree lines, to guide the viewer’s eye through the image towards the main subject.


- **Foreground Interest:** Include interesting elements in the foreground to add depth and draw the viewer into the scene. This could be rocks, flowers, or fallen leaves.


2. Lighting


Lighting is one of the most critical aspects of landscape photography. 


It can dramatically change the mood and impact of an image.


- **Golden Hour:** The hour after sunrise and the hour before sunset provide soft, warm light that’s perfect for landscapes. The low angle of the sun creates long shadows and enhances textures.


- **Blue Hour:** The period just before sunrise and after sunset, known as the blue hour, offers a soft, blue light that can create a serene and moody atmosphere.


- **Weather Conditions:** Don’t shy away from shooting in different weather conditions. Fog, rain, and storms can add drama and interest to your landscapes.


3. Focus and Depth of Field


Achieving the right focus and depth of field is essential for sharp, detailed landscapes.


- **Hyperfocal Distance:** Focus at the hyperfocal distance to ensure maximum depth of field, keeping both the foreground and background sharp.


- **Aperture Settings:** Use a small aperture (f/8 to f/16) to increase depth of field and keep more of the scene in focus. However, avoid very small apertures (f/22 and smaller) as they can cause diffraction and reduce sharpness.


4. Using Filters


Filters can enhance your landscape photos and help you manage challenging lighting conditions.


- **Polarizing Filter:** Reduces glare and reflections, enhances colors, and increases contrast. It’s especially useful for photographing water and skies.


- **Neutral Density (ND) Filter:** Reduces the amount of light entering the lens, allowing for longer exposures even in bright conditions. This is ideal for creating silky-smooth water effects or capturing motion blur in clouds.


- **Graduated ND Filter:** Balances the exposure between the bright sky and darker foreground, preventing overexposed skies and underexposed landscapes.


Practical Tips for Landscape Photography


1. Scout Your Location


Research and visit your location ahead of time to find the best vantage points and compositions. 


Use apps like Google Earth and photography-specific tools to plan your shoot and identify the best times for lighting.


2. Be Patient


Patience is key in landscape photography. 


Wait for the right light, the perfect cloud formation, or the ideal moment when everything comes together. 


Sometimes, you might need to revisit a location multiple times to get the shot you envision.


3. Use a Tripod


A sturdy tripod is essential for landscape photography, especially in low light conditions or when using long exposures. 


It helps keep your camera stable, ensuring sharp images.


4. Check the Weather


Keep an eye on the weather forecast and be prepared for changing conditions. 


Dramatic weather can create stunning landscapes, but it also requires readiness and adaptability.


5. Experiment with Different Perspectives


Don’t just settle for eye-level shots. Try different angles and perspectives. 


Get low to the ground for a unique viewpoint or find a high vantage point for a sweeping panorama.


6. Include a Human Element


Adding a person to your landscape can provide a sense of scale and make the image more relatable. 


It helps viewers connect with the scene on a personal level.


7. Shoot in RAW


Always shoot in RAW format to preserve the maximum amount of detail and flexibility in post-processing. 


RAW files contain more data than JPEGs, allowing you to make significant adjustments to exposure, white balance, and colors without losing quality.


Finding Inspiration for Landscape Photography


1. Explore Your Local Area


You don’t have to travel to exotic locations to capture beautiful landscapes. 


Start by exploring parks, nature reserves, and scenic spots in your local area. 


Familiarity with these places can lead to unique and personal images.


2. Study the Masters


Look at the work of renowned landscape photographers like Ansel Adams, Galen Rowell, and Sebastiao Salgado. 


Analyzing their images can teach you a lot about composition, lighting, and storytelling.


3. Join Photography Communities


Participate in online forums, social media groups, and local photography clubs. 


Sharing your work, receiving feedback, and engaging with other photographers can spark new ideas and keep you motivated.


4. Challenge Yourself


Set personal challenges or projects to push your creativity. 


For example, you could focus on photographing a particular type of landscape, like mountains or coastlines, or try capturing the same scene in different seasons.


5. Keep a Photography Journal


Document your experiences, thoughts, and observations in a photography journal. 


Note what works and what doesn’t, and keep track of locations you’d like to revisit. 


This practice can help you refine your skills and develop a deeper understanding of your craft.


Final Thoughts


Landscape photography is a rewarding and enriching pursuit that allows you to connect with nature and capture its beauty. 


By mastering the techniques and tips outlined above, you can create stunning images that inspire and evoke emotions. 


Remember, the key to great landscape photography is a blend of technical skill, patience, and a deep appreciation for the natural world. 


So, grab your camera, head outdoors, and start capturing the breathtaking beauty that surrounds us. 


Happy shooting!

From Pasindu (Pasindu’s Imperfect Shutter) 🥰


#pasindusimperfectshutter #photographyeveryday #photography #beginnersguide #essentialsofphotography #landscapephotography #learnphotography #beginnerfriendly #nature

Capturing the Essence of People: A Guide to Portrait Photography


Capturing the Essence of People: A Guide to Portrait Photography: Image by Pasindu’s Imperfect Shutter
Capturing the Essence of People: A Guide to Portrait Photography: Image by Pasindu’s Imperfect Shutter 


Portrait photography has always been one of my favorite genres. 


There's something truly magical about capturing the essence of a person, their personality, and emotions in a single frame. 


In this article, I'll share my insights on portrait photography, including techniques, practical tips, and sources of inspiration to help you create stunning portraits.


What is Portrait Photography?


Portrait photography focuses on capturing the likeness, personality, and mood of a person or group. 


It can be formal or candid, posed or spontaneous. 


The goal is to create a compelling image that tells a story about the subject.


Techniques for Great Portraits


1. Lighting


Lighting is the cornerstone of portrait photography. It shapes the subject's features and sets the mood of the photograph.


- **Natural Light:** Soft, diffused natural light is ideal for portraits. Shoot during the golden hours (early morning or late afternoon) for the best results.


- **Studio Lighting:** Use softboxes, umbrellas, and reflectors to create soft, even lighting. Experiment with different setups like Rembrandt lighting, butterfly lighting, and split lighting to find what works best for your subject.


- **Off-Camera Flash:** Off-camera flash allows for more control and creativity. Use it to create dramatic lighting effects and eliminate harsh shadows.


2. Composition


Composition is about arranging elements within the frame to create a balanced and visually appealing image.


- **Rule of Thirds:** Position your subject off-center, along the lines of the rule of thirds, to create a more dynamic composition.


- **Leading Lines:** Use lines to draw the viewer's eye to the subject. This could be a path, a row of trees, or even the subject's gaze.


- **Framing:** Use natural frames like windows, doorways, or foliage to add depth and focus to your portraits.


3. Posing


Posing can make or break a portrait. 


It's about making the subject feel comfortable and look their best.


- **Relaxation:** Encourage your subject to relax and act naturally. Candid shots often capture the most genuine expressions.


- **Angles:** Experiment with different angles to find the most flattering perspective. Shooting from slightly above can make the subject's eyes appear larger and more engaging.


- **Interaction:** For group portraits, have the subjects interact with each other to create a more dynamic and natural look.


4. Lens Choice


The choice of lens significantly impacts the look of your portraits.


- **50mm Prime:** Known as the "nifty fifty," this lens offers a natural perspective and beautiful bokeh.


- **85mm Prime:** Ideal for portraits, this lens provides a flattering compression of features and a shallow depth of field.


- **Zoom Lenses:** Versatile and convenient, zoom lenses like the 24-70mm allow you to adjust framing without moving.


Practical Tips for Portrait Photography


1. Communicate with Your Subject


Building a rapport with your subject is crucial. 


Talk to them, make them feel comfortable, and give clear, positive feedback. 


This helps them relax and results in more natural expressions.


2. Focus on the Eyes


The eyes are the windows to the soul. 


Ensure they are sharp and well-lit. 


Use a shallow depth of field to make the eyes stand out while keeping the background blurred.


3. Mind the Background


A cluttered or distracting background can take attention away from your subject. 


Choose a simple, uncluttered background or use a wide aperture to blur it out.


4. Experiment with Depth of Field


A shallow depth of field isolates the subject from the background, making them the focal point. 


Experiment with different apertures to achieve the desired effect.


5. Capture Emotions


Emotions make a portrait come alive. 


Look for moments of genuine emotion, whether it's a laugh, a thoughtful expression, or a look of surprise. 


These moments add depth and authenticity to your portraits.


6. Use Reflectors


Reflectors are a great tool to bounce light back onto your subject, filling in shadows and adding a catchlight in the eyes. 


They are especially useful in natural light settings.


7. Try Different Perspectives


Don’t be afraid to move around and try different perspectives. 


Shoot from above, below, or even from behind to create unique and interesting portraits.


Finding Inspiration for Portrait Photography


1. Study the Masters


Look at the work of renowned portrait photographers like Annie Leibovitz, Richard Avedon, and Yousuf Karsh. 


Analyze their use of lighting, composition, and posing to learn what makes their portraits stand out.


2. Explore Different Genres


Draw inspiration from other genres of photography. 


Street photography, fashion photography, and even landscape photography can offer new ideas and techniques to incorporate into your portraits.


3. Use Social Media


Platforms like Instagram, Pinterest, and Flickr are treasure troves of inspiration. 


Follow photographers whose work you admire and engage with their content to discover new ideas and trends.


4. Join Photography Communities


Join online forums, photography clubs, or attend workshops to connect with other photographers. 


Sharing experiences and receiving feedback can spark new ideas and improve your skills.


5. Experiment with Themes


Create portraits based on themes or concepts. 


This could be anything from “joy” to “urban life.” Themes provide a framework that can push your creativity and help you tell a cohesive story through your images.


In Conclusion


Portrait photography is a rich and rewarding genre that allows you to capture the essence of your subjects. 


By mastering the techniques and tips outlined above, you can create stunning portraits that tell compelling stories and evoke emotions. 


Remember, the key to great portrait photography is practice, patience, and a genuine connection with your subject. 


So, grab your camera, find a willing subject, and start creating beautiful portraits that will stand the test of time. 


Happy shooting!

From Pasindu (Pasindu’s Imperfect Shutter) 🥰


#pasindusimperfectshutter #photographyeveryday #photography #beginnersguide #essentialsofphotography #portraitphotography #learnphotography #beginnerfriendly

Featured Post!

Understanding the Basic Concepts of Photography: A Beginner’s Guide

Photography is more than just pointing a camera! Image by Pasindu’s Imperfect Shutter  Photography is more than just pointing a camera and ...